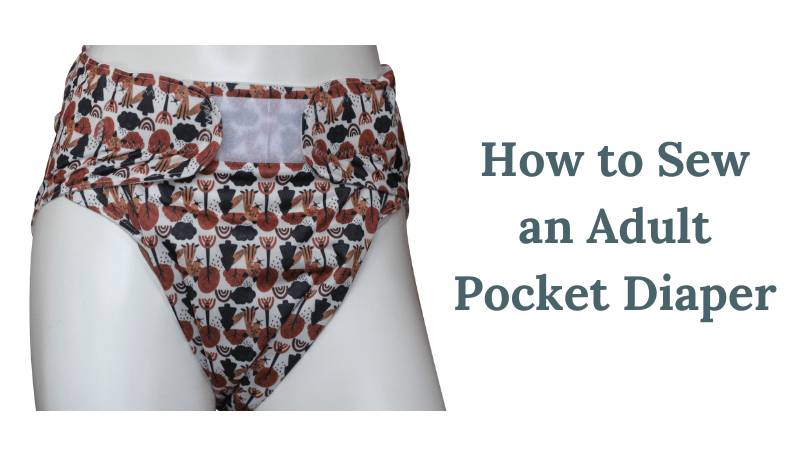
Adult sized pocket diapers are easy to find online at a variety of price points and their popularity is merited. Made up of a waterproof shell, stay-dry lining, and a pocket for stuffing absorbency, pocket diapers are easy to put on and simple to wash.
How to Use a pocket diaper
To use a pocket diaper, you need 2 things: the shell and an absorbent insert (or 2). The inserts for pocket diapers tend to be rectangular in shape with rounded edges. When purchased from somewhere, the inserts are most often made from microfiber. While microfiber is a very fast absorbing material, it does better when paired with another insert made from a natural fiber.
Related content: A Quick Guide to Inserts: What, Why, and How to Use Them
These inserts get stuffed into the pocket diaper before use and the diaper gets put on as one piece – no separate cover needed. After use, the inserts are removed for laundering. Drying time is often an issue with super absorbent products, but since the inserts are removed, they dry faster.
How to Make an Adult Pocket Diaper – Supplies
Fabric
To make a pocket diaper, you will need 3 types of fabric: waterproof, stay-dry, and absorbent fabric for the insert.
1. Waterproof fabric – all pocket diapers are made from PUL. Since other fabrics like PVC plastics that some adult cloth diaper covers are made from tend to be delicate and need special care to last, I do not recommend using those types of fabrics for a pocket diaper. If you want a different option from PUL, just make sure the fabric can withstand washing on hot heat in a machine.
2. Stay-dry fabric – stay-dry fabric wicks moisture from the skin and into the absorbent fabric beneath. There are 3 main types of stay-dry fabrics: microfleece, suedecloth, and athletic wicking jersey (AWJ). Each has their own set of pros and cons, but all would work well for sewing a pocket diaper. Other non-stay-dry fabrics like flannel can also work.
3. Absorbent fabric – any type of absorbent material can be used to make inserts for a pocket diaper. The number of layers needed for each inserts depends on the thickness of the fabric (and the capacity of your sewing machine). Flannel is much thinner than fleece, so you will need to use more layers of flannel.
For example, microfiber, in particular, is very thick. I’ve found that my serger can only easily handle 3 layers. Regular sewing machines that can handle thicker, heavier fabrics will be able to sew more layers than other light weight machines.
Notions
Ballpoint, Jersey, or Stretch needles – PUL is considered a knit fabric and needs to be sewn using a ballpoint, jersey, or stretch needle.
Elastic – Pocket diapers have sewn-in elastic for the legs, a casing for the pocket, and fold over elastic (FOE) for the gusset (optional). Use ⅜” knit elastic for sewn in applications and ½” braided for the pocket casing. For an overview of elastic types, check out Seamworks’ guide.
FOE comes in many different colors and sizes. 1” or ¾” will work best for the gusset.
Fasteners – PUL tends to be susceptible to holes, so avoid using pins, snappi, or boingos. Attaching hook and loop tape or snaps is best. Size 20 KAMSnaps come in a wide variety of colors and are easy to find. Hook and loop tape that is at least 2” wide is needed to hold up an adult pocket diaper. You can check out my fastener recommendations here.
Sewing Machine – while just about anything can be sewn by hand, it’s much less time intensive to use a sewing machine. All you need is a basic machine to sew an adult pocket diaper.
A Pocket Diaper Pattern – You can make your own pattern by tracing an existing diaper or purchase my Adult Pocket Diaper Pattern. I’m using that pattern for this tutorial.
How to Make an Adult Pocket Diaper – Cutting Fabric
Start by cutting out your pattern and fabric. You will need 1 panel of waterproof PUL fabric and 1 panel of stay-dry fabric for the lining.
If you are using snaps, you will need to cut out an additional piece of fabric for the front panel to re-enforce the snaps. You could also cut out a bunch of little squares of PUL to go behind each snap.
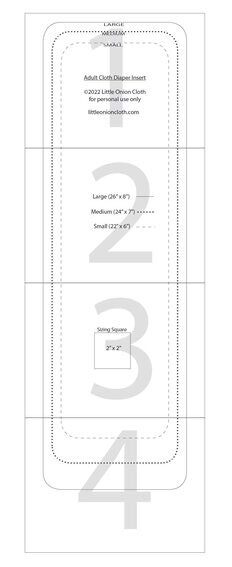
For the insert, cut out as many layers as you desire. To get enough absorbency, you may need to sew multiple inserts. To finish the edge of the insert, you can use a zigzag or overlock stitch if you don’t have a serger.
When folding the fabric, only fold it as much as you need to in order to fit the pattern. This will help save you a ton of fabric, especially on the larger size of diapers.
How to Sew an Adult Pull Up
Once you have your pieces cut out, it’s time to sew!
Step 1: Sew Inserts
Stack inserts layers on top of one another. Stitch around the outer edge using a zigzag stitch or serging. If you are only using 2 layers of fabric, you can turn and topstitch.
Step 2: Sew Pocket Casing
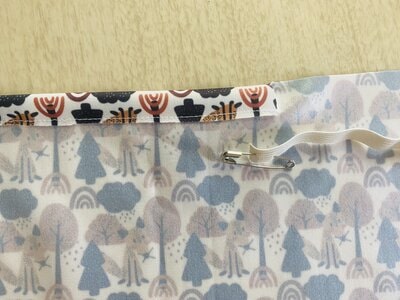
Fold top tab of fabric down on lining and PUL. Pin in place and stitch across the bottom, leaving both ends open.
Feed length of ½” braided elastic through casing. Stitch elastic down at each end.
Step 3:
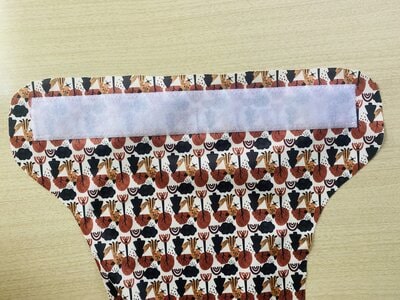
Attach snaps or loop tape to front of PUL panel. Remember, if using snaps, you will need to re-enforce them with an additional piece of fabric.
Step 4:
Lay PUL and lining panel right sides together. Pin and stitch around entire diaper, starting and stopping at pocket casing.
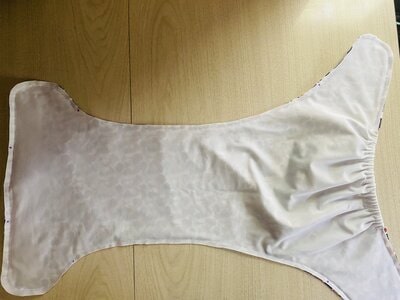
Step 5:
Stitch ⅜” knit elastic between markings at front and legs of diaper.
Step 6:
Clip corners to reduce bulk before turning.
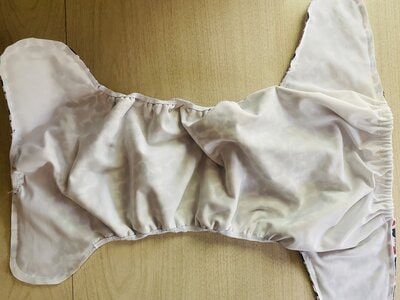
Step 7:
Turn diaper right side out. Topstitch around diaper, stopping at the back opening.
Step 8:
Attach snaps or hook tape and laundry tabs to inside of pocket wings.
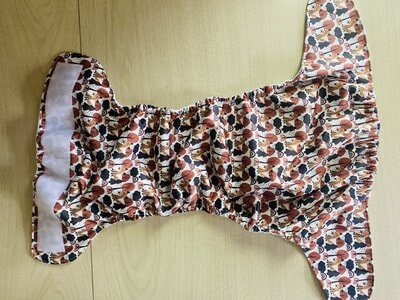
Step 9: Gussets (optional)
Pin FOE to straight edge of gusset and stitch using 3 step zigzag.
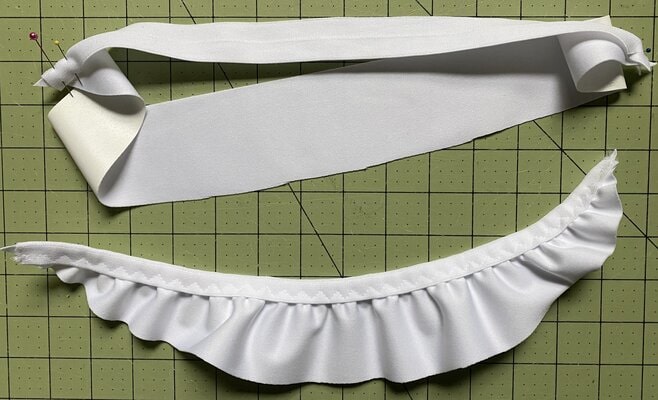
Step 10: Gussets cont.
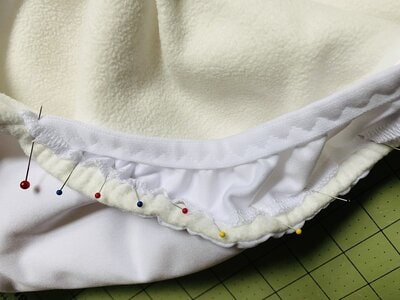
Pin rounded edge of gusset along stitch line for leg elastic at gusset markings.
Stitch close to the edge using straight stitch.
Optional: Serge the rounded edge of PUL before stitching down.
FINISHED!
Alecia
Latest posts by Alecia (see all)
- How to Make a Cloth Diaper Bigger - August 21, 2023
- Best Swim Diapers for Adults and Youth - July 18, 2023
- Adult Cloth Diaper Hacks: How to Make a Swim Diaper - July 14, 2023

